Excel Forms are super useful if you collate data manually, for example via email or PDF forms. Or even if you’ve set up an Excel template for your users to enter data into, that you then spend time converting into a layout suitable for use with formulas and PivotTables.
Excel Forms don’t require any complex coding and those entering the data can access the Form from a web browser on any device without the need to even open Excel.
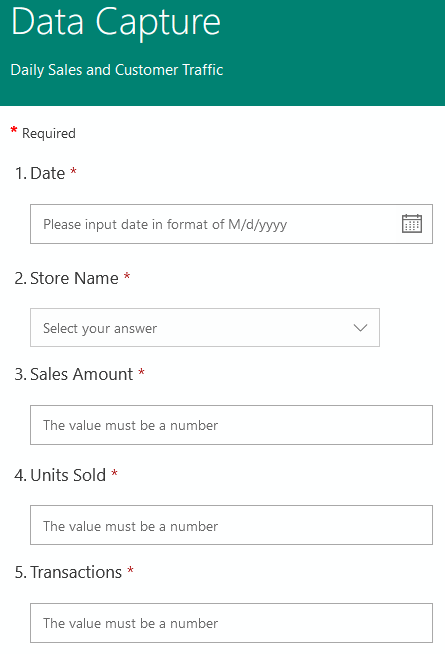
Excel Forms present a clean data entry front end based on questions and fields you set up:

And the data entered into the form is placed in an Excel file in the perfect tabular format ready for further analysis:

Note: Forms for Excel is currently in Preview, which means the Excel team are still working on it and improvements are likely to be added over time.

For those without an Office 365 or Microsoft 365 account*, Forms can be created from the Microsoft Forms site:
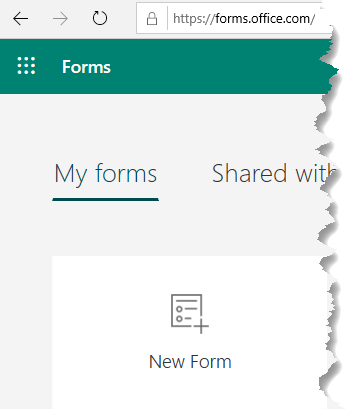
*Sign in with your Microsoft 365 school credentials, Microsoft 365 work credentials, or Microsoft account (Hotmail, Live, or Outlook.com). Tip: you can get an Outlook.com email account for free 😊
Note: Live results in the associated Excel file are not possible when creating Forms from here. Instead use one of the following options to create your Form.
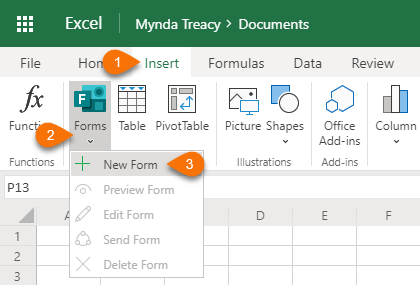
Microsoft 365 and Office 365 users can create an Excel Form from Excel Online:
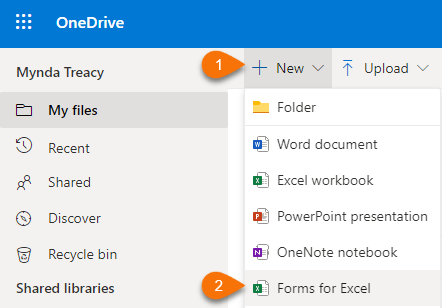
Or OneDrive for Business:
After clicking the ‘New Form’ button start by giving your form a name (1) and an optional description (2). Then choose the type of question (3). My form is going to be used to capture daily sales data from 4 stores:
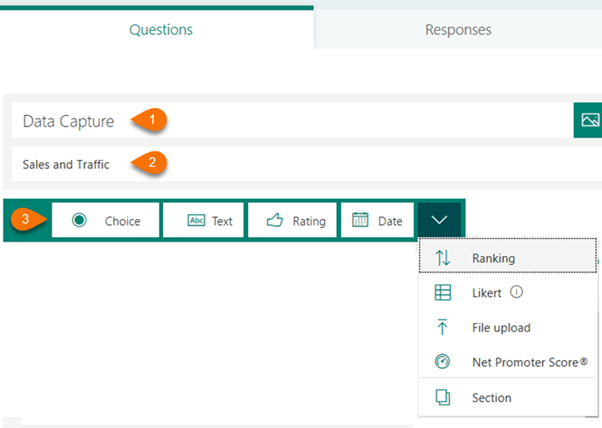
Forms can also be used to create questionnaires or surveys, so the question types include everything from multiple choice options through to Net Promoter Scores.
There are 8 different question types to choose from, but there’s only 3 or 4 that you’d use when capturing data.
With each question you can choose whether it’s required or optional by switching the toggle at the bottom of the question.
The Date field will default to take the date format based on your regional settings*. You can see in the image below that mine are d/mm/yyyy:
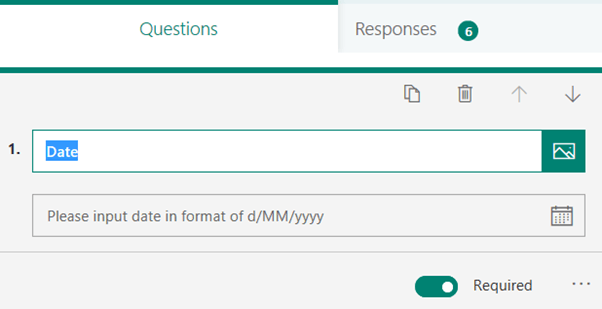
*I’ve found this inconsistent. Depending on where you’re creating the form (Forms.Microsoft.com/OneDrive for Business/Excel Online) you can get different date formats irrespective of your regional settings.
The Choice question is handy if you want people to choose from a list. Think of this as data validation where you can ensure the data is entered uniformly with consistent spelling and case. The Choice setting default are radio buttons, but you can choose a drop-down list from the ellipsis (see image below):
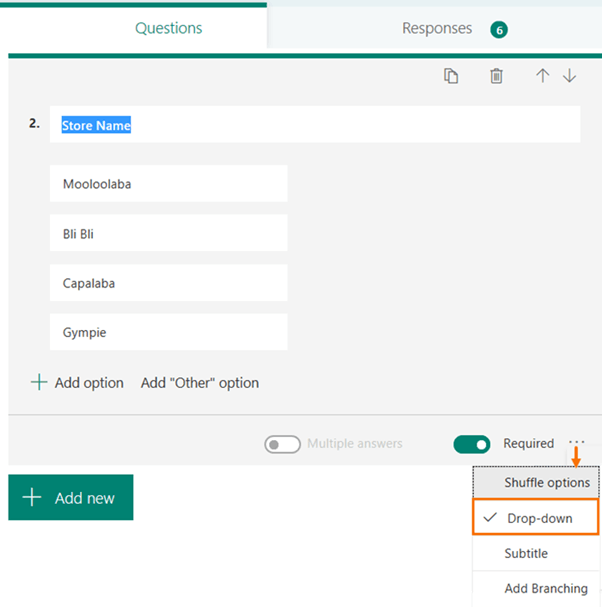
Notice you can accept multiple answers by switching the toggle at the bottom of the question. It’s not relevant in my example but may be useful.
Use the Text field for capturing free form data entry like text or numbers. In my example I’m using a Text question to capture the sales figures:
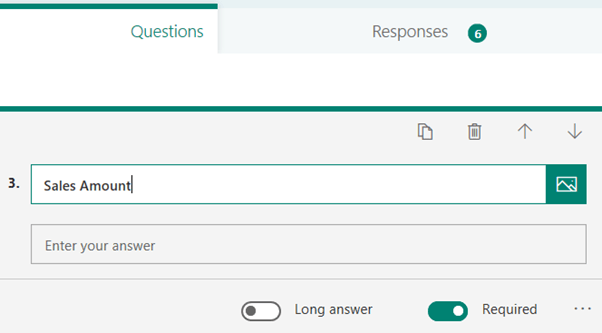
Notice you can switch the toggle at the bottom to allow long answers, but because I’m collecting numbers, I want to set a restriction by clicking the ellipses:
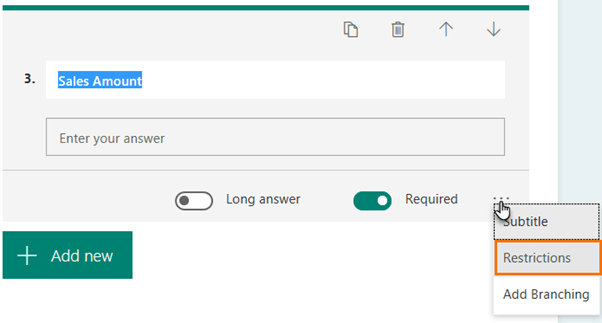
Tip: Notice above there is also an option for Branching, but that’s more commonly used in surveys.
Then choose “Number” from the drop-down list:
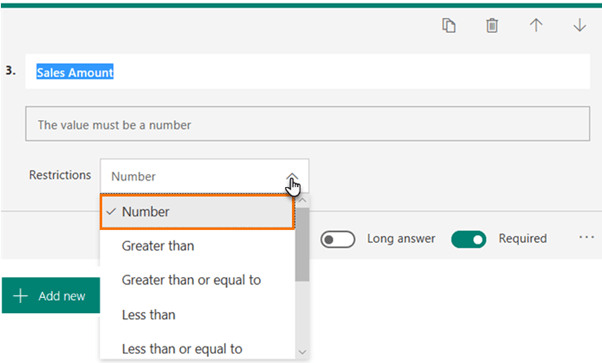
Notice you can choose from other restrictions like greater than, less than etc.
Add more questions by clicking the ‘Add New’ button. When you’re done, check the Preview in the top right:

And add a Theme if you like:
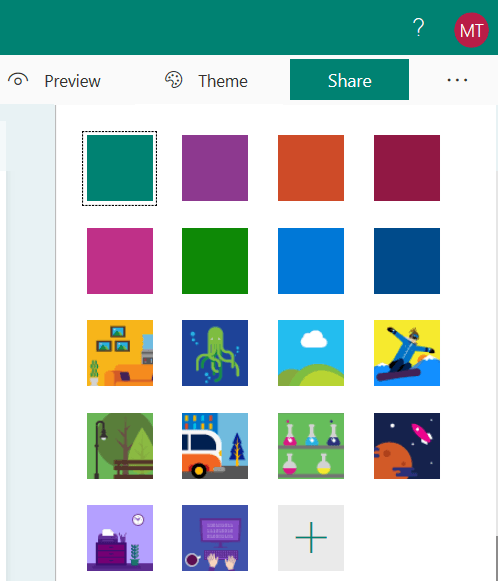
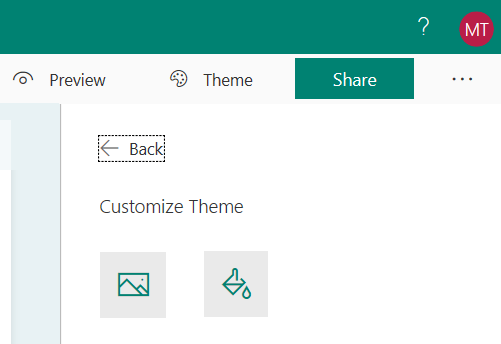
Choose from the built-in themes shown above, or click the + sign to upload your own image or customise the colour:
When you’re ready to share your form, click the ‘Share’ button and choose from the drop down whether you want anyone to complete the Form or only those inside of your organisation, the latter requires Microsoft 365 or Office 365:
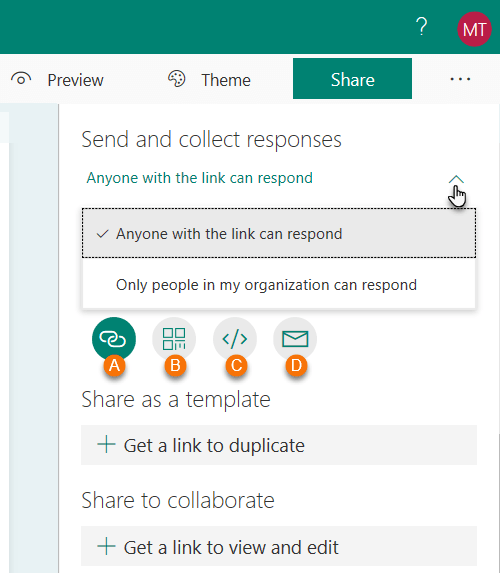
Choose how you want to share your Form:
Notice in the image above you can also share the form as a template and collaborate with others inside your Microsoft 365 or Office 365 tenant.
Once you’ve started collecting data, you’ll want to analyse it in Excel and the options will differ depending on the location you choose to set up your Excel form.
If you used Option 1 and set up your form via Forms.Office.com you get some high level analysis of the results on the ‘Responses’ tab, which is handy if you’ve created a survey, but if you’re using the form to collect data that you want to analyse, then you’ll want to open the Excel file. Clicking on the ‘Open in Excel’ button (see image below) will download the responses up to that point in time. The file is no longer linked to the Form, so any new responses that come in won’t be included. You’ll need to download the file again to get the updates.
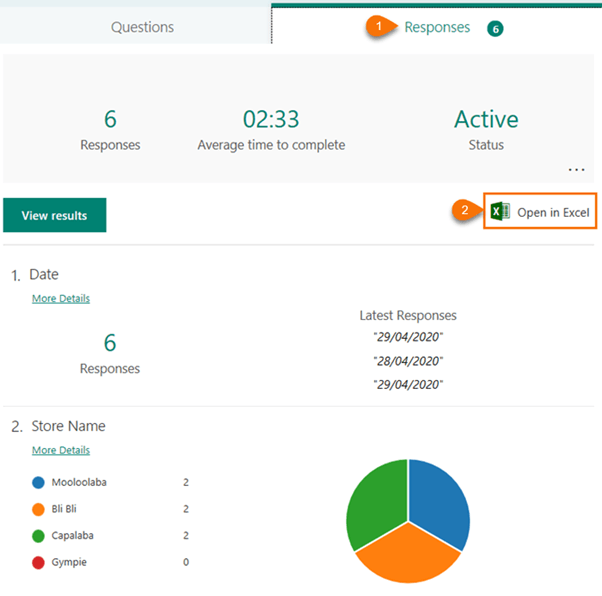
However, if you have a Microsoft 365 or Office 365 account and created the Form via Excel Online (Option 2) or used OneDrive (Option 3), then in addition to the high-level analysis shown on the Responses tab, you can simply open the Excel file you created the Form in and your data will be there ready to analyse.
The important distinction is that options 2 and 3 maintain a live connection to the Form, so new data entered into the form is updated in the Excel file in real time (ok, maybe a second or two lag, but close enough).

The first 5 columns of the Table capture standard data:
ID – this is an automatically generated unique identifier for each record i.e. each form completed.
Start Time – the time the form was opened.
Completion Time – The time the form was submitted. You can use these fields to calculate how long it takes to complete the form.
Email and Name columns - If you’re collecting data from users in your Office 365 tenant and they’re logged in when they enter data in the form, their email address and name will be captured in the table in Excel. Otherwise, ‘anonymous’ is entered for those not logged into Office 365:
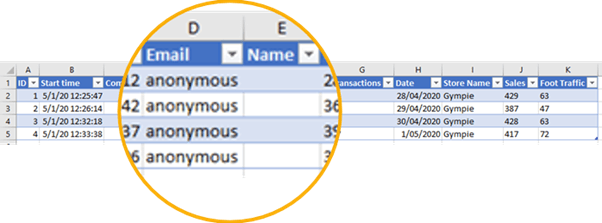
The remaining columns contain the responders’ answers to your questions.
IMPORTANT: Don’t mess with this table by adding/removing columns/rows, sorting etc. because it could corrupt the connection between the Excel file and the Form. If you want to modify the table for analysis you should open a new workbook and use Power Query to get the Form data and do your data cleaning etc. so it’s ready for analysis.
Excel Forms are limited to collecting 2000 responses. If you require more, you can subscribe to Forms Pro.
Forms is currently in preview, if you have any feedback for the Excel team, post it here on UserVoice.
AUTHOR Mynda Treacy Co-Founder / Owner at My Online Training HubCIMA qualified Accountant with over 25 years experience in roles such as Global IT Financial Controller for investment banking firms Barclays Capital and NatWest Markets.
Mynda has been awarded Microsoft MVP status every year since 2014 for her expertise and contributions to educating people about Microsoft Excel.
Mynda teaches several courses here at MOTH including Excel Expert, Excel Dashboards, Power BI, Power Query and Power Pivot.
How to create a dynamic Excel calendar that updates automatically, highlights important dates, and adapts to any year.
Easily create dynamic multi-level dependent drop-down lists in Excel. Speed up data entry and reduce errors.
5 essential Excel tricks to automate your spreadsheets and save hours of work each month. Learn how to update drop-down lists, consolidate data, and create dynamic text labels with ease.
Excel Tables are a must have skill for all Excel users and their Structured References are a much simpler way to dynamically name ranges.
The new Excel Formula Editor enables you to more easily write, debug, and manage formulas with a modern interface.

Microsoft Forms simplify data collection with Excel integration and prefilled links accessible from any device. Create, edit, and sync forms.

Discover five hidden Excel tools that can transform your workflow and boost productivity, making you more efficient.
How to make money with Excel turning beginner to advanced Excel skills into cash with these jobs and opportunities.
These 6 essential Excel tools most users overlook will change the way you work in Excel and improve productivity.